| Search |
| Search |


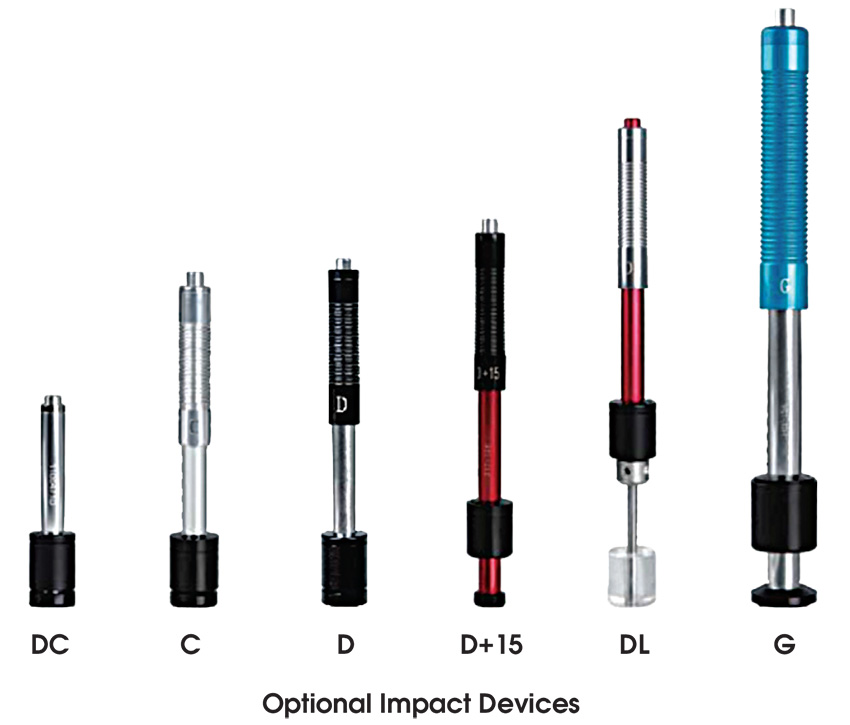
| Impact device | D | DC | DL | D+15 | C | G | |
|---|---|---|---|---|---|---|---|
| Application | For the majority of your hardness testing requirements | Use in very confined spaces, e.g. in holes, cylinders or for internal measure- ments on assembled machines | For measurements in extremely confined spaces or at the base of grooves | For measurements in grooves or recessed surface | Surface hardened components, coatings, thin walled or impact sensitive components (small measuring indentation) | Solid components. E.g. heavy castings and forgings | |
| Impact energy | 11Nmm | 11Nmm | 11Nmm | 11Nmm | 3Nmm | 90Nmm | |
| Mass of impact body | 5.5g | 5.5g | 7.3g | 7.8g | 3g | 20g | |
| Tip | Diameter | 3mm | 3mm | 3mm | 2.78mm | 3mm | 5mm |
| Hardness | 1600HV | 1600HV | 1600HV | 1600HV | 1600HV | 1600HV | |
| Material | Tungsten carbide | Tungsten carbide | Tungsten carbide | Tungsten carbide | Tungsten carbide | Tungsten carbide | |
| Impact Device | Length | 147mm | 86mm | 202mm | 162mm | 141mm | 254mm |
| Diameter | 20mm | 20mm | 20mm | 20mm | 20mm | 30mm | |
| Weight | 75g | 50g | 100g | 80g | 75g | 250g | |
| Max. hardness of sample | 940HV | 940HV | 950HV | 940HV | 1000HV | 650HB | |
| The average roughness of sample | Ra: 1.6μm | Ra: 1.6μm | Ra: 1.6μm | Ra: 1.6μm | Ra: 0.4μm | Ra: 6.3μm | |
| Min. weight of sample | of compact shape | 5 kg / 11lbs | 5 kg / 11lbs | 5 kg / 11lbs | 5 kg / 11lbs | 1.5 kg / 3.3lbs | 15 kg / 33lbs |
| on solid support | 2 kg / 4.5 lbs | 2 kg / 4.5 lbs | 2 kg / 4.5 lbs | 2 kg / 4.5 lbs | 0.5 kg / 1.1 lbs | 5 kg / 11 lbs | |
| coupled on plate | 0.05 kg / 0.2 lbs | 0.05 kg / 0.2 lbs | 0.05 kg / 0.2 lbs | 0.05 kg / 0.2 lbs | 0.02 kg / 0.045 lbs | 0.5 kg / 1.1 lbs | |
| Min. thickness of sample | uncoupled | 25 mm / 0.98 inch |
25 mm / 0.98 inch |
25 mm / 0.98 inch |
25 mm / 0.98 inch |
15 mm / 0.59 inch |
70 mm / 2.73 inch |
| coupled | 3 mm / 0.12 inch |
3 mm / 0.12 inch |
3 mm / 0.12 inch |
3 mm / 0.12 inch |
1 mm / 0.04 inch |
10 mm / 0.4 inch |
|
| surface layer thickness | 0.8 mm / 0.03 inch |
0.8 mm / 0.03 inch |
0.8 mm / 0.03 inch |
0.8 mm / 0.03 inch |
0.2 mm / 0.008 inch |
||
| Indentation size on test
surface with 300 HV, 30 HRC |
diameter | 0.54 mm / 0.21 inch |
0.54 mm / 0.21 inch |
0.54 mm / 0.21 inch |
0.54 mm / 0.21 inch |
0.38 mm / 0.015 inch |
1.03 mm / 0.04 inch |
| depth | 24 μm / 960 μinch |
24 μm / 960 μinch |
24 μm / 960 μinch |
24 μm / 960 μinch |
12 μm / 480 μinch |
53 μm / 2120 μinch |
|
| Indentation size on test
surface with 600 HV, 55 HRC |
diameter | 0.45 mm / 0.017 inch |
0.45 mm / 0.017 inch |
0.45 mm / 0.017 inch |
0.45 mm / 0.017 inch |
0.32 mm / 0.012 inch |
0.9 mm / 0.035 inch |
| depth | 17 μm / 680 μinch |
17 μm / 680 μinch |
17 μm / 680 μinch |
17 μm / 680 μinch |
8 μm / 2560 μinch |
41 μm / 1640 μinch |
|
| Indentation size on test
surface with 800 HV, 63 HRC |
diameter | 0.35 mm / 0.013 inch |
0.35 mm / 0.013 inch |
0.35 mm / 0.013 inch |
0.35 mm / 0.013 inch |
0.30 mm / 0.011 inch |
|
| depth | 10 μm / 400 μinch |
10 μm / 400 μinch |
10 μm / 400 μinch |
10 μm / 400 μinch |
7 μm / 280 μinch |
||